|
Photoshop 'Hidden Image' Guide
By Matt Kment
This is a step-by-step guide to making those hidden
images you see all over OT. You know, the ones where you
highlight the picture and see boobies.
Before we
get started, there are 3 things you need.
1. Photoshop 7
(though if you have any sort of a brain at all, you should be
able to figure it out for 6.x and 5.x as well)
2. This Picture
3. This Picture
Now that we have all
that out of the way, let's get started.
Step
1
Open refpic.jpeg in Photoshop. If you can't
figure this part out, you might as well stop reading now, but
I'll tell you anyway. Go to the File menu and click
Open.
Step 2
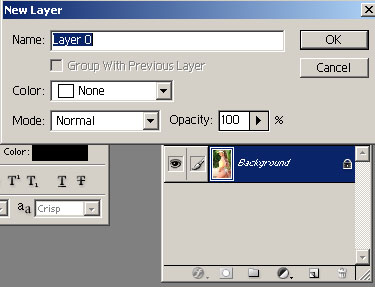 Rename
the Background layer. By default, Photoshop names the
first layer Background. We can't do things we need to
do to this layer since it's locked, but this can be solved by
simply renaming the layer. Double-click the layer
name. It will show Layer 0 by default. This works fine, so
press
OK. Rename
the Background layer. By default, Photoshop names the
first layer Background. We can't do things we need to
do to this layer since it's locked, but this can be solved by
simply renaming the layer. Double-click the layer
name. It will show Layer 0 by default. This works fine, so
press
OK.
Step
3
Duplicate the layer. To do this, simply right
click on the layer's name and click on Duplicate Layer. You
now have 2 identical layers - one named Layer 0, and the other
named Layer 0 Copy.
Step 4
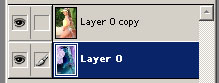 Click on the original layer (Layer 0). Press Ctrl+I
to invert the image. If you look at the large image you won't
see a difference since there is a layer on top of it, but if
you look at the thumbnail next to the layer name, you will see
that the colors have been
inverted. Click on the original layer (Layer 0). Press Ctrl+I
to invert the image. If you look at the large image you won't
see a difference since there is a layer on top of it, but if
you look at the thumbnail next to the layer name, you will see
that the colors have been
inverted.
Step
5
We will now create a halftone pattern. Click on
the File menu and go to New. Enter the settings as shown here (be sure background is transparent).
Since we're going to be working with very small objects, zoom
in as far as Photoshop will let
you.
Step
6
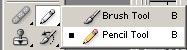 Select the Pencil tool. If the Brush tool
is selected, right click on the Brush Tool and select Pencil
tool. Select the Pencil tool. If the Brush tool
is selected, right click on the Brush Tool and select Pencil
tool.
Step
7
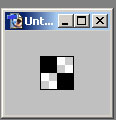 Set the brush size to 1 (the option for
that is at the top of the screen with all the tool options,
just below the File, Edit, etc menus). Make a single dot in
the top left corner and a single dot in the bottom right
corner. Set the brush size to 1 (the option for
that is at the top of the screen with all the tool options,
just below the File, Edit, etc menus). Make a single dot in
the top left corner and a single dot in the bottom right
corner.
Step
8
While still on our new halftone pattern image,
press Ctrl+A to select the entire image. Now go to the Edit
menu and click on Define Pattern. Name the pattern anything
you want. You can now close the halftone pattern image, it's
no longer needed since you should now have a pattern
defined.
Step 9
Now switch back
to the original image with 2 layers. Layer 0, which should be
the original image with inverted colors, and on top of that
there should be Layer 0 Copy, which should be the original
image with the original colors. Create a new layer on top of
Layer 0 Copy by pressing Ctrl+Shift+N. Name the layer anything
you want, I'm leaving it as the default Layer 1 for the sake
of keeping this simple.
Step
10
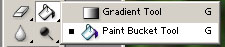 Select the Flood Fill Tool. It may be set
to the Gradient tool, you can use the same method as the
Pencil/Paintbrush to switch the
tool. Select the Flood Fill Tool. It may be set
to the Gradient tool, you can use the same method as the
Pencil/Paintbrush to switch the
tool.
Step
11

 These controls are at the top of your
screen, just below File, Edit, etc. Set the Fill mode to
Pattern, the Pattern to the pattern we just created, the mode
to Normal, the Opacity to 100%, and be sure that All Layer is
unchecked. The rest of the options don't matter. Now click
anywhere on the image (Layer 1 should be selected) and it will
be filled with the halftone pattern. If it looks funny, it's
probably because you're zoomed out. Be sure you're zoomed in
to 100% if you want everything to look right while you're
working on it. These controls are at the top of your
screen, just below File, Edit, etc. Set the Fill mode to
Pattern, the Pattern to the pattern we just created, the mode
to Normal, the Opacity to 100%, and be sure that All Layer is
unchecked. The rest of the options don't matter. Now click
anywhere on the image (Layer 1 should be selected) and it will
be filled with the halftone pattern. If it looks funny, it's
probably because you're zoomed out. Be sure you're zoomed in
to 100% if you want everything to look right while you're
working on it.
Step 12
Hold
down the Ctrl key on your keyboard and click on Layer 1. This
will select everything on Layer 1 - in this case, a bunch of
dots. Now click on Layer 0 copy and press the Delete key on
your keyboard. Press Ctrl+D to deselect
everything.
Step 13
 Turn off the halftone pattern layer (Layer 1). This
is done by clicking the small "Eye" icon next to the layer's
name. Turn off the halftone pattern layer (Layer 1). This
is done by clicking the small "Eye" icon next to the layer's
name.
Step 14
Open overlay.jpg. Press Ctrl+A to select the
entire image, then press Ctrl+C to copy the image to your
clipboard.
Step 15
Close
overlay.jpg. You should now be back at the image we've been
working on this whole time. Create a new layer on top of Layer
0 Copy by clicking on Layer 0 Copy and pressing Ctrl+Shift+N.
I'll leave it with the default name of Layer 2. Press Ctrl+V
to paste the overlay image into Layer 2. I was nice and made
overlay.jpg and refpic.jpeg the same dimensions, so everything
should line up properly.
Step
16
Set the opacity of Layer 2 to 50%. This can be
easily accomplished by clicking on Layer 2 and pressing the
number 5 on your keyboard. At this point we are nearly
finished, but you can see that parts of the original image
stick out like a sore thumb, namely her shirt and her
thong.
Step 17
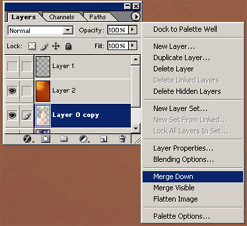 We need
to fix the problems with certain parts of the original image
standing out. To do this we will adjust the contrast of the
original, but we must merge the layers first. To do
this, click on Layer 0 Copy, then click the little arrow
inside the circle in the upper right corner of the Layers
palette and select Merge
Down. We need
to fix the problems with certain parts of the original image
standing out. To do this we will adjust the contrast of the
original, but we must merge the layers first. To do
this, click on Layer 0 Copy, then click the little arrow
inside the circle in the upper right corner of the Layers
palette and select Merge
Down.
Step 18
Now that we have the layers
merged, we need to adjust the Contrast. To do this, first
click on the merged layer (Layer 0). Now go to the Image menu,
select adjustments, then click on Brightness/Contrast. Set the
Contrast to -30.
Congratulations, you're finished!
Save your JPG and start posting it everywhere to piss people
off. The thong is still slightly visible, but with a better
selection of pictures you can make it nearly transparent to
the user until they highlight it. Your final image should look
like this:
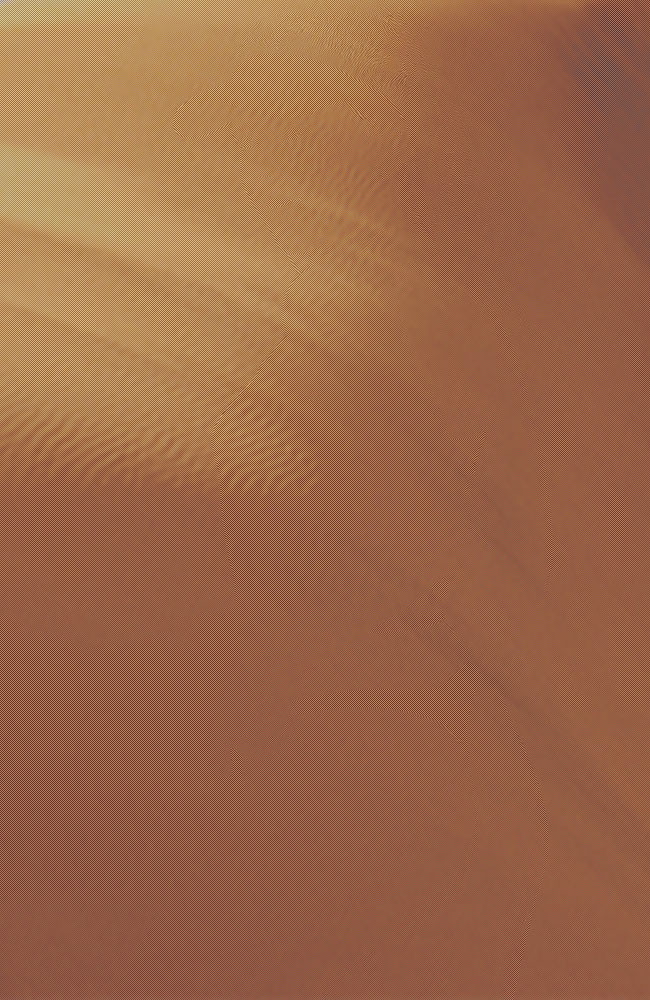
Highlight the
image to see the magic!
Click here
for the .PSD file from this tutorial. I left the 2 layers
containing the original image separated to make it easier to
see how everything is set up, and as such the contrast is not
adjusted properly. Follow steps 17 and 18 to end up with the
final image.
|


